Showing posts with label home-made embellishment. Show all posts

Saturday, January 5, 2013

Be Positive (scrapbooking)

Hello.

Today I have a scrapbook page to share.  It is about me.  This would be the first time I've ever scrapbooked about me.  I was inspired by a challenge at 2peas - the new In the Mood to Scrap for Jan 1, 2013 where Wilna wanted us to use the mood board she created as inspiration as well as pick a word that means something to us.
 
If you check out the mood board, you will see that I used the quote "creativity takes courage" as it really spoke to me.  I also used the same colour for my 'word' - which was cut the old fashioned way (printed in reverse on paper and cut with a craft knife). 


Here is a close up of the bottom corner of the page.  I like the little pops of pink and red in the tiny flowers on the punched circles of designer paper.
 
 
And I like the stitiching on some of the elements which gives it a home-made feel.
 
 
Supplies used:  Paper - Deck the Halls from Holly Jolly collection (My Mind's Eye) - Yup ... Christmas paper used on a non-Christmas page  - it is the lovely brown tone on tone damask background paper and oh so beautiful!!, Blush collection (BasicGrey) - that's the turquoise, Sunshine collection (My Mind's Eye) - the pattern used for the hexigons, Market (My Mind's Eye) the cute little flower pattern from those little circles and the back of that is the ledger paper that the word 'Simplify' is stamped onto, Basics White (BasicGrey) - the paper I printed the quote onto and the date tag; Ink - Walnut Stain (Ranger); Other - 1" and 1/2" circle punches (Stampin' Up!), hexigon shapes were traced from the negative cardboard from punching out game pieces from one of my son's games  ... I knew it would come in handy!!, sewing maching, brown pearls from my stash.
 
Sorry about the poor quality photography.  I continue to struggle with lighting in my craft room. Might have to splurge on a better lamp.
 
So, are you courageous enough to scrapbook about yourself??!!  Go for it.
 
Thanks for dropping by for a visit.
Donelda
 

Tuesday, January 1, 2013

Lilacs - Scrapbook Page

Wow, I did't realize it would be so difficult to get back in the saddle.  It is hard to find your scrapbooking mojo when you've been away from it for so long (or crafting in general!).
 
Been spending time reconnecting with the scrapbooking world over on 2peas in a bucket

I started out making a sketch ... but you'll notice I strayed a bit.


Here is my page.  Took me way too long!  LOL!

 
And the details.  Note that I made the tags myself.  Other than the letters and the bird, all of the embellishments were handmade.  If I am not able to buy all the goodies in the world, I will need to make them.  This is something I find fulfilling ... like old fashion scrapbooking before there were so many dies and pemade embellies to buy.  You'll be seeing a lot of homemade stuff on my pages. 
 
 
I will be entering it in the last Memory Keeping Monday Challenge (2peas is changing a bunch of the weekly challenges/video topics) which was to use any of the challenges covered in 2012's MKM challenges.  I chose the chipboard challenge posted 07/16/12.  I used the chipboard frame and bird.
 
Supplies: Papers - Reindeer Fly Paper (Holly Jolly - My Mind's Eye), Origins Collection (BasicGrey), papers from my stash; Ink - Walnut Stain (Ranger); Stamp - Designer Woodgrain (Hero Arts); Ribbon - Plum Pudding twill (Papertrey Ink); Punches/Diecuts - leaves (Stampin' Up!), burst (Martha Stewart) 1/4" and 1/2" circle punches (Stampin' Up!), Labels 8 (Spellbinders); Letters from Blush collection (BasicGrey); Chipboard - bird (Megenta), frame (unknown); Other - packaging (K&Co.), linen thread (Papertrey Ink), brown acrylic paint, vellum (blue and white). 
 
I hope you like and maybe get inspired by my page today.
Thanks for visiting.
Donelda

Friday, April 13, 2012

Counterfeit Kit 1 - Noteworthy

Hello everyone.  Yes, my creative mojo is still missing (maybe it will return this weekend?)  However, I have found something crafty and fun to do in the meantime. 

I have found this great blog called Counterfeit Kit Challenge.  The whole idea behind it is to create your own version of expensive embellishments and craft kits that you can buy online because we know that none of us really need more stuff!  I love the concept.

I decided to play with the April 2012 Inspiration Kit - Counterfeit Kit Challenge.  The beautiful kit is seen here and is from Kits de Somni (scroll down to half way through the newsletter). 


Check out all the delicious colours.  Well, I looked around at my stash of stuff and decided I could replicate the kit into a mini card kit.  I started out by finding papers that fit with the ones in the kit -  along the back.  I started out with the plaid - the second from the right, and then found similar papers that matched the original kit from there (like the dots, floral, stripes, etc).  Then I proceeded to find or make items that would match those in the kit. 

My kit is called - Noteworthy


I think, in the end, I did a pretty good job of replicating the kit.  Check out that blue die cut at the bottom right .. the one with the pointing finger.  Just like the kit only home-made.  And 2 of the flowers ... home-made.  I don't collect a lot of embellishment-like items so I had to improvise, found some in sticker or die sheets from paper packages, made some, or cut some from designer paper. 

All in all, this was so much fun.  And now, I have this great kit to use!  How many cards do you think I could make with it???  or maybe a mini scrapbook??  I'll get at it and show you the results when I get something done.


Thanks for dropping in!! 
Donelda

Wednesday, March 21, 2012

Crafty Creations Challenges #162 - Photo Inspiration - Happy Birthday Princess

Hello everyone.  This week's Crafty Creations Challenge #162 is Group 1's challenge but when I saw this lovely inspiration photo I just had to give it a go!!


I focused on the pink pattern with the little flowers, the banner in the background, and the gold crown.  Here is what I ended up with!


Very different from my typical style ...


A fun collage of items - embossed crown (French Country Postage - Gel a tins), hand-made rolled flower, little heart button!!


and this is only my 2nd time making a banner! 

Now you need to go see what everyone else did with this great inspiration photo - go to Crafty Creations Challenges.  And then once you are inspired, give it a go to win from In 2 Stamps

Donelda

Wednesday, March 14, 2012

Crafty Creations Challenge #161 - The Cow Jumped Over the Moon

This week at Crafty Creations Challenge #161 the challenge is to create project/card with your favourite childhood fairy tale character.  When I was little I had a clock that showed the cow jumping over the moon that I loved.  So, when I saw this image from Meljen's Designs Digital Stamps, I knew what I'd be doing!!


And here is a close up showing the dimension!


The little star on the sentiment banner is made from no bake clay cut with a small shape cutter. 

Now you need to go check out what the rest of Design Team Group 2 did:


and check out the Crafty Creations Challenge blog where items will be posted by anyone from Design Team Group 1 who couldn't resist these lovely Mother Goose images as well.

Now it's your turn ... create an item that is inspire by your favourite childhood fairy tale character and link it up at Crafty Creations Challenges!!  See you there!!
Donelda

Thursday, January 12, 2012

Wishes and Banners

I created these banners based on the ones you can buy at Papertrey Ink ... of course I don't own them and have to make them by hand!!  Used 2 different black markers with different sized tips for the double lines around the banners.

I have used a card by Anya as inspiration but can't for the life of me find the link!!  Sheesh. Sorry Anya but thanks for hte inspiration!!  If anyone has the link, please share!!

Thanks for visiting.
Donelda

Thursday, December 15, 2011

Our Creative Corner - Rustic Ruffled Anniversary

I saw this inspiration photo collage from Our Creative Corner and I couldn't resist all those ruffles.  The different layers of cream ruffles with the soft blue flowers inspired me most.

Here is the card I created:


I made the hand-rolled flower. Love the 3 pearls in the middle. The leaves are cut from some material.  I also made the long ruffle at the bottom from some material I bought at a garage sale.  The other lace are some of my favourites!


The colours also fit the CCC colours - an amazing combo:
My co-worker was looking for a few Anniversary cards so I added the appropraite sentiment in Chocolate Chip.

Thanks for dropping by.
Donelda

Saturday, December 3, 2011

Colour Q Challenge #113 and Make It Monday #43 - Ribbon Pleating

The Colour Q Challenge colours this week are amazing!  I really like Sahara Sand and I'm always trying to find great colours to go with them ... this is it!! 


I decided to combine the colours with this week's Make It Monday challenge #43 from Papertrey Ink - Ribbon Pleating.  I don't think I've ever tried ribbon pleating so I decided to "take it easy" and just do a few pleats like on Dawn's 2nd card in the video. 

Supplies used include Background Basics: Retro and Birthday Basics (both Papertrey Ink), Spring Rain grosgrain ribbon (Papertrey Ink), Sahara Sand, Night of Navy, Whisper White, and other blue cardstock (Stampin' Up!). 

And see, I've used another one of my "home-made" half & half die cuts.  I have had a lot of people ask how I do this.  Nothing magical I assure you.  I simply took some light cardboard, traced some edges of other dies I had with nice curvy edges, made straight edges and cut them out.   Now, if I want a "half & half die" that I don't own (yet - getting them for my birthday) I just trace the outline onto cardstock or patterned paper and cut it out by hand!  More effort but cheaper!!  Here is a photo of the 3 I made ...


This colour combo is going to inspire lots of increadible projects.  I'm off to check it out!!
Donelda

Tuesday, November 8, 2011

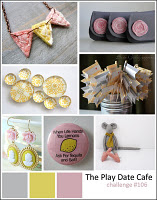
Play Date Cafe - More Pink, Yellow, and Grey

( Note - this is my second post for today.  To see my Take 3 card, scroll down.)

I just can't seem to stop creating with this color combo!!  


Here are 2 more cards. 
This card started out with that awesome K&Co. fabric brad.  Love it!  Love this Clean and Simple effect.


This card was created based on the top right image of the inspiration picture.  When I saw that, I remembered that I had made this pink flower from ribbon a while ago and never used it.  The leaves are cut from yellow patterned paper ... the color is off in this picture.

Okay, I have had a huge run on challenges these days .... whew!!!

Thanks for visiting!  Hope you enjoyed all my challenges.
Donelda

Thursday, October 13, 2011

Hello Pink Butterfly

Hi everyone!  Just thought I'd pop in and share this card I made a while ago!  I used one of my home-made templates to create a "half and half" die like the ones that Papertrey Ink are selling (and I do not own!). 


I saw on someone's blog they were proving that you don't have to 'own it all' to create beautiful cards! 
Here is proof!!

Thanks for dropping by. 
Donelda

Monday, August 29, 2011

Take 3 - Cupcakes - First Take

So another Take 3 Challenge for myself.  This time it is not a stamp but to use this awesome cupcake paper from Creative Imaginations.  I found it on sale half price at my LSS. 

I must admit, this is my least favorite card made with it.  There are so many possibilities with this type of paper ... as you will see tomorrow and Wednesday for my second and third takes of this paper!! 

I used some kraft ticket die cuts that I have left over from Stampin' Up! (you remember those packages of die cut out images that they sold before punches became popular!!  I have a bunch left!).  I sponged on some Close to Cocoa ink and then drew the lines around the ticket.  The sentiment is from Mixed Messages (Papertrey Ink) and the stars are from Out on a Limb Additions (also PTI). 

So, make sure you come back tomorrow and Wed. for much nicer cards using this paper!  I can't wait to show you :-)

Donelda

Monday, August 22, 2011

Take 3 - Pig - First Take


This week I bring you another Take 3 Challenge.  This time I am using this adorable pig image from Studio g that I picked up at Michaels.  I just couldn't resist him!  He is so cute!!
So, I kept things pretty typical with this take - pink pig and all!!  I added the sentiment which comes from an old SU! set (one of those sets you got for free when you spent so much $$ during a specific month).  The ribbon started out as pink but I added the strips of black.  And there is another one of my home-made Half & Half dies (like the ones from Papertrey Ink but home made!). 

You will need to return to see what else I did with this cute little fellow tomorrow for my Second Take card.

Until then,
Donelda

Thursday, February 10, 2011

Buttons, Buttons ... Home-made Thomas Kinkade Button


So today over at Papertrey Ink (Nichole Heady's blog - see the link at bottom right of my blog) they are showing off their great new idea ....Buttons!!  Are you kidding me????  Brilliance!!!

To enter to win, Nichole wanted us to create a project with buttons.  Well, this is my card.  There is a lot of "old items" used up on this card.  Let's see....

I guess the first thing is the button.  I had a Thomas Kinkade calendar that was beautiful.  Once it was finished, I was looking at it before ...gasp ... throwing it away.  I noticed on the back of the cover there were SMALL scale photos of each page ... perfect to add to cards or something ... so of course I kept it!!  Then I saw some awesome buttons on Jenni Bowlin's site that were made from "pictures" and realized that my small scale Thomas Kinkade pictures would be perfect for this.  So I punched out a good piece of one image and then added 2 small holes in the middle and finished it off with some hemp.   Here is a close up ... see those cute little swans swimming in the lake??!!

On this card there are some other "interesting" itmes.  See the pale colored circles ... well they are the color of linen a "newish" color of Papertrey Ink.  Well, I don't actually own any of that color but I did snag some of the packaging from my last PTI order.  And then there is the ribbon.  That I cut off a sweater this morning, LOL!!  You know, those ribbons they sew into sweathers so you can hang them.  Well, I don't hang sweaters so I just cut the ribbon out.  It was a nice ivory color but that didn't go with my creation so I simply used one of my Copic markers to make it match my project!!  Yeah!! 

Staying true to my New Year's resolution ... use what I have, use up my scraps and pieces of projects I've created.  Maybe tomorrow I'll take a picture of what I have left to use up!!  LOL!!  You will laugh .. trust me :-)

Okay, now I have to get my son up, showered and off to school ...
Donelda

Tuesday, January 18, 2011

Hand-made Flower

You have probably all seen the lovely hand made flower
 tutorials that are all over the blogging world.  I had wanted
 to try my hand at it but kept putting it off.  In the end I tried one like Maille Belles makes (see her tutorial at the end of THIS post). 

Mine doesn't look nearly as beautiful as those created by Maille, but it will do and it is a start.  I kept the rest of the card clean and simple to really show off the flower.  The leaves are from a punch by Martha Stewart.  The senitment is from the 2010 free anniversary gift from Papertrey Ink (Round and Round) which is bent on the block to follow the circle edge. 

 
Have you tried making these flowers yet??  If so, I'd love to see your creation.  Leave me a link!!

Donelda

Sunday, April 18, 2010

Stitched Star - Lucy's Cards Challenge #9

I love Lucy's blog, she is such a talented card maker!! So I like to try to participate in her challenges that hse has recently started. Challenge #9 has to include stitching.
I really like the look of stitching on cards and I had recently made a bunch of stars out of old jeans that I stitched (thanks to inspiration from Char) ... a perfect starting point for this project.
I took inspiration for my background from Donna at three umbrellas. She makes the most amazing backgrounds that I've been meaning to try so I decided today was the day!! I stamped the dots on white cardstock with versamark and clear embossed them. Then I applied distress inks over top. I decided not to add dropplets of water but that looks cool too as you can see on THIS card.
Supplies: Stamps - Polka Dot Basics II, Simple Little Things (Papertrey Ink); Ink - Spiced Marmalade, Faded Jeans, Peeled Paint (Ranger), Paper - Whisper White (Stampin' Up!); Other - old jeans, sewing machine and thread, sponge applicator, Labels 1 die (Spellbinders), dimensionals.
Now I must go see all the other cards created with stitching on them!! Can't wait for the inspiration!! Thanks to Lucy for another great challenge!
Donelda