Showing posts with label Doodling. Show all posts

Wednesday, January 23, 2013

Scrapbooking Starting Point with Shimelle - You Rock (Scrapbooking)

I am a huge Shimelle fan (and a Glitter Girl fan too!).  I visit Shimelle's blog often and was excited to see she had a challenge up called Scrapbooking Starting Point.  She started with this basic layout and added her own photos, title, and embellishments.  She wanted us to start at this point in the process, forget what she did and just do our own thing!  Awesome idea!!
 
 
I had to give myself a few days break to actually forget what Shimelle did (or try to forget) so that I wouldn't just copy her overall finished result. 
 
In the end, I scrapped these photos of my son playing his guitar when we were camping.  I chose bright colours for my patterened papers (all BasicGrey)!  The arrow-like stamp ... that is one I created myself! 
 
 
While Shimelle always uses stickers for her title, I decided to go with stamps and used jibber jabber from Alley Way Stamps (stamped with Walnut Stain ink by Ranger).  I also used the ticket stamp from the Miss Caroline set by My Minds Eye (with Fired Brick ink by Ranger).  And see that brown circle with the embellishments - it is actually a postage circle stamp from French Country Postage by gel-a-tins.  I like it alot because it is not a perfect circle but has imperfectios. 
 
 
To finish the layout, I added a few blue heart brads to my 3 embellishment spots as well as a few green brads at the top right and bottom left corners.  I spattered on some Mr. Huey's Dark Calico color mist (that is becomming a favourite of mine!) and drew some brown lines around the edge of the cardstock to finish off the page.
 
 
So, if you are interested in scrapbooking and want some inspiration, you MUST visit Shimelle's blog! (and go see Glitter Girl at 2peas as well!!)
 
Thanks for dropping by.
Donelda

Tuesday, April 17, 2012

CASual Friday #48 and Less is More #63 - Hugs

Hello.  Nice to see you again LOL!

Today I have a card that again (2 days in a row) fits for 2 challenges.  The first one is CASual Friday #48 where we were to use opposite colours on the colour wheel for our Clean and Simple card.  I chose orange and green.   The second challenge is the Less Is More Challenge #63 - doodling.  Well, I love to doodle and I had seen Godelieve do some amazing doodled birds a while ago .. and the idea popped into my head to make an orange doodled bird.


And here is my card.  The picture didn't turn out so great, for some reason he is really shy and did not want to cooperate and take a nice photo. 


The sentiment is from Jibber Jabber - The Alley Way Stamps and all the other images are hand drawn ... or doodled!!  FUN!!

Okay, off to see everyone else's doodles....

Donelda

Sunday, April 15, 2012

The Alley Way Stamps (TAWS) and Less Is More - Sweet Friend

Hello everyone!  Today I have created a cute card.  I took the inspiration from 2 different challenges going on right now.  The first one is The Alley Way Stamps Be Inspired Challenge #3.   I mean look at this delicious photo and colours for inspiration.  And the second challenge is the Paper Pretties Wednesday challenge #201 - to use 2 or more different designer papers on your project. 


Here is my card ... clearly inspired by the photo above.  I used 3 different sets to create the focal point.  Kitchen Gadgets for the scale, part of an image in Snow Much Fun for the container as well as a circle for the cherries, and finally the sentiment is from Jibber Jabber.


That was a whole lot of fun!!
Donelda

Saturday, March 3, 2012

Tulip Baby Welcome

Hi everyone!
I tend not to combine challenges and then, if I'm ever brilliant enough to do so it is usually a maximum of 2 different challenges.  So you can imagine my surprise when I realized that I could combine 4 different challenges without my head exploding!  LOL!

First up, the CAS-ual Fridays challenge was to make a baby card. Also, Use it Tuesday's challenge is also to make a baby card - in celebration of Heather's new arrival Clarie!  As it just so happens, I need one!


Then I saw these lovely soft colours on the Play Date Cafe challenge ... that would work!


and finally over at Our Creative Corner the challenge is Over the Edge, which I love but rarely think to do....(and I see I am too late to link it up for the challenge ... sigh!)

In the end, it all came together with this card:


Featuring 2 of my own hand-created stamps.  The background image is a new one - a starburst of sorts, and then my flower image - which I think can be used as a rose (see yesterday's card) or as a tulip as shown here.  It also features my home-made template for the Sahara Sand (Stampin' Up!) panel across the front (looks way more kraft in the image but is a much softer sand colour in real life!).


Here is a close up of the dimension.  Senitment if from Round and Round (Papertrey Ink anniversary stamp set).

This card was so much fun to make!!! Now I'm off to load it up and check out what all the other challenge go'ers made with these challenges.
Donelda

Thursday, September 8, 2011

Moxie Fab Sketch 4

(note - this is my 4th post for today .. I've been busy! ... to see 3 other
Moxie Fab World sketch cards scroll down!)
And finally, the last of the Moxie Fab World sketches ...
And my card.....


I don't own any "big medallian - like" images so I decided to create a smaller card.  The flower is cut and put up on dimensionals.  The box around the card is hand drawn with a ruler.

Thanks for visiting. 
Have a great sunshiny day (hopefully where you are!)
Donelda

Moxie Fab Sketch

Cath over at Moxie Fab World has some great sketches for inspiration.  Here is one ....


And here is my card ....


Donelda

Tuesday, July 5, 2011

Take 3 - Week of July 4 - part 2

Here is Take 2 in this week's Take 3 challenge.  This time, I used the train in conjunction with a sentiments from a Papertrey Ink set (the 2nd year anniversary set).  And, no, that middle train car image does not come in the Studio G set .. I drew it around the sentiment!  I think it turned out really cute!! 

This particular layout seems to be cropping up a lot!!  I need to change it up a bit!

Thanks for droppig by today.  Make sure you come back tomorrow to see what the last Take 3 card looks like using these cute train image!

Thanks, Donelda

Wednesday, June 22, 2011

Take 3 - Week of June 20 - part 3

Well today is the 3rd take on this awesome Hero Arts image.  Today's card is not nearly as "girly" as the other 2.  For this card I decided to stamp the image onto some kraft cardstock and then color it in using a white watercolor pencilcrayon.  I really like the softer and more subtle effect!  Then again, I tend to gravitate toward the earthy colors! 

Thanks for visiting me during my second week of Take 3.  I have another week ready to go for next week so be sure you drop by to see what I have in store!!

Donelda

Thursday, January 13, 2011

Love Tag

I bet I made this tag more than 2 years ago!  It has sat, unused, in my bin of scrap items.  It has been patient!!  And finally, it belongs to a card which will likely get used this Valentines day.  (Note that I have edited the photo again, the original I had here was too yellow and the true colors were hard to see, this is much better.  Thank you for being patient with my lighting issues!)

The tag was made by stamping the branches and leaves (branch from Take a Bough and leaves from Beautiful Blooms - both Papertrey Ink) and then embossing them with clear embossing powder.  Then, the tag was sponged with Broken China ink (Ranger).  The hearts were cut from red cardstock and a small highlight of white added with my gel pen (Signo).  The Love sentiment is from Mixed Messages (Papertrey Ink) and popped up with dimensionals. 

The tag was added to the card by adhering the 3 strips of color (green, brown, and red) directly onto the card.  Then the tag was added with dimensions.  A bit of doodling around the edge of the card finishes it off.  


Enjoy.
Donelda

Monday, November 22, 2010

Butterfly Flight

A while ago I was playing with transparencies and alcohol inks.  Back then I had made this focal point, which then got put into my "use later" bin.  There is a lot going on in that focal piece.  I started out by cutting a piece of clear acetate or tranparency with a Labels 1 (Spellbinders) die. Then, I used some green alcohol inks (Ranger) to color it (probably Lettuce and Meadow).  Next, I adhered some text paper from an old book (bought at a garage sale many years ago).  Finally, I added the butterfly (Rubber Stampede) and flourish (Fancy Flourishes, Papertrey Ink) using StazOn ink. 

So a few days ago, I pulled this piece from my bin and wanted to add it to a card.  I decided that I liked the piece so much I wanted to keep it the 'main attraction' so kept the rest pretty clean and simple.  I added a round birthday sentiment also found in my "use later" scrap bin (an old retired Stampin' Up set).  To finish off the card, I used my .3 black marker (Prismacolor) and a ruler around the edge of the card. 

Lots of white space on this card.  If you can (I realize this feature does not seem to work for everyone) click on the picture so you can see the focal piece close up and check out everthing going on there!

Thanks for dropping in today!   Have a good one!
Donelda

Monday, August 30, 2010

Monster Cards - Inspired by Lucy

Hi all!!

The other day I was blogging around the www and found some great inspiration pieces.  THIS card by Lucy got me started on a monster frenzy!!


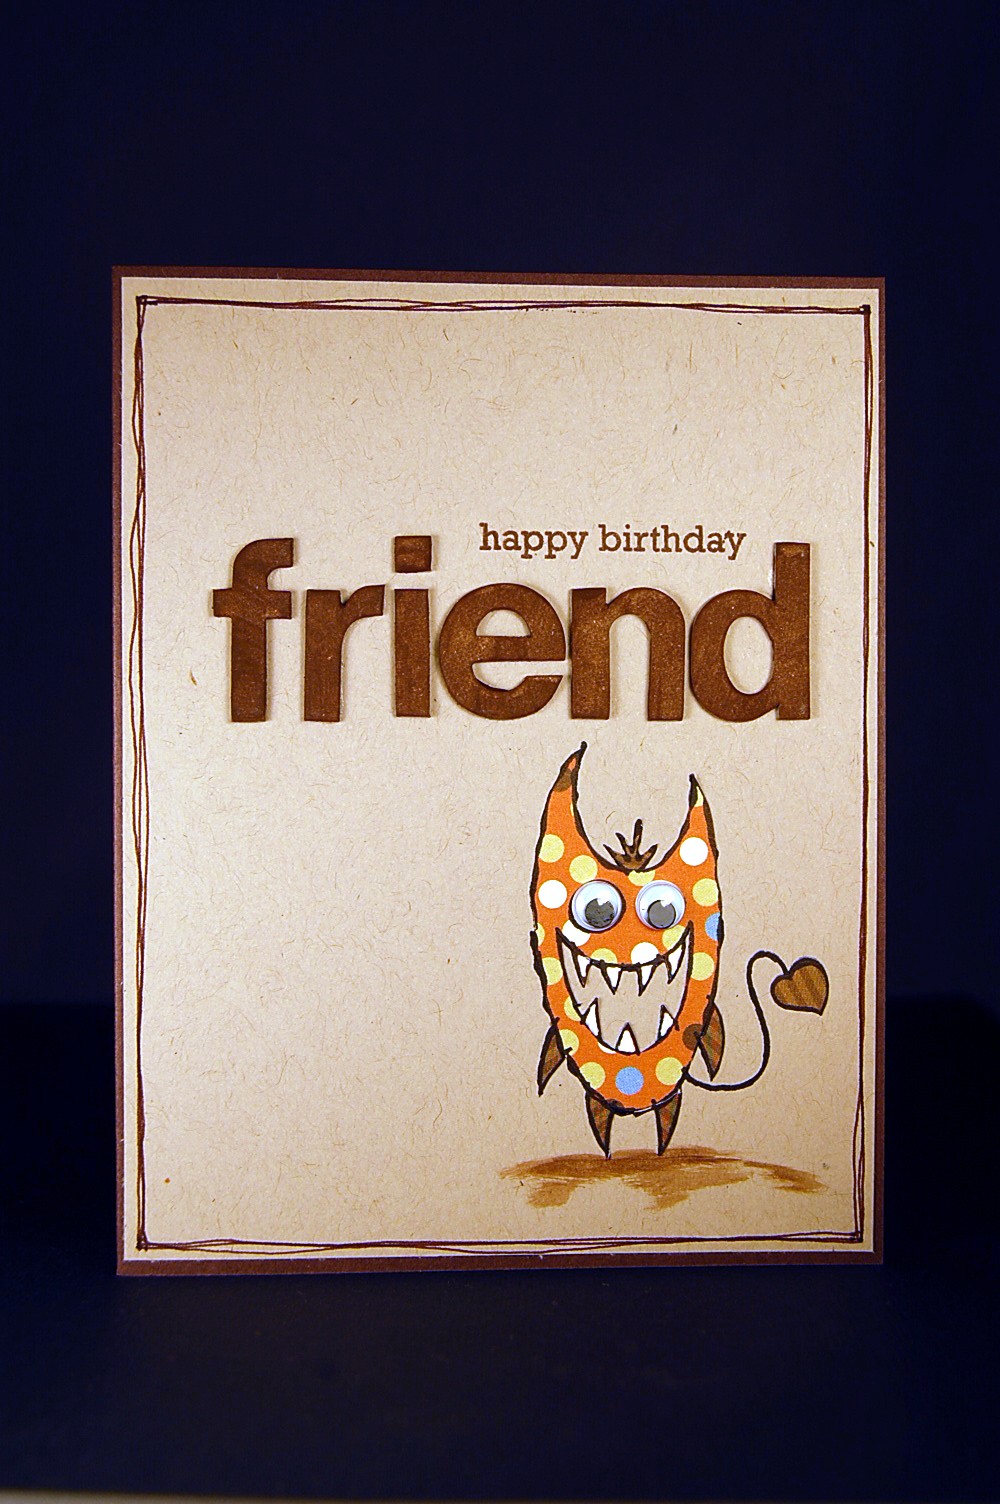
Here is a paper pieced monster for a friend!


These guys were lots of fun to pull together with a bit of masking!


I love this guys' blue tongue!!


And this guy is sooooo cute!!


Supplies: Stamps - My Little Monsters (REcollections), Birthday Basics and Paper Tray (Papertrey Ink), Paper - white, kraft (Stampin' Up!), all designer paper are from my scrap bin; Other - various Copic, black marker, googlie eyes, chipboard letters (Heidi Swapp).

I hope my monsters don't scare you ... they really are friendly!! 
Donelda

Monday, August 2, 2010

Clean and Simple (CAS) Challenge - 78 Fishy Dots

The Clean and Simple (CAS) challenge over on Splitcoaststampers (#78) is to use Polka Dots on your card. 

This is one of my favorite ways to use polka dots - especially the close ones (like those found in Polka Dot Basics II from Papertrey Ink).

This little fish is created by dry painting blue and purple paint onto watercolor paper.  Then I stamped the fish over top in black ink once it is all dry.  (I had done this many years ago and finally pulled him out of my box of images to use!!). 

A rounded corner and a little doodling and the card is finished!!

Supplies: Fishy Friends (SU!), Polka Dot Basics II, Pond Life Sentiments (Papertrey Ink); Ink - Tempting Turquoise (SU!), Jet Black (Ranger); Paper - Very Vanilla (SU!); Other - Post It Note (3M), Coluzzle, black marker (Prismacolor), dimensionals. 

Thanks for dropping in today!!
Donelda

Thursday, December 31, 2009

Masculine and Dots

Happy New Years!! I hope you all celebrate tonight like it's 1999..... hehehehe!!!! So here is that pine cone again... you know, the one from Papertrey Ink's First Fruits set. I used it on THIS card and here is a double cone version. This card is rather masculine, often difficult for me. I might have to recreate this a few times!! I doodled around the focal image with my brown marker. The dotty paper behind the focal image is from an 8x8 pad of designer paper from Me and My Big Ideas. The sentiment is from one of my favorite sets, Mixed Messages (also Papertrey Ink) Thanks for dropping in to my blog and thanks for leaving a comment to let me know what you think~~ Donelda

Wednesday, October 7, 2009

One Layer Card - Masking

Making one layer cards can be challenging but also a lot of fun. They are great to make because they can be easily mailed!! One easy way to create interesting one layer cards is by using MASKS!
I bought these masks from Tim Holtz' collection a few weeks ago. I was so excited to see that he has come out with some smaller ones that are easier to use on cards (don't get me wrong, I've seen some great stuff done with the larger ones, smaller is just easier).
I stared out with a white card base. I placed the masks where I wanted them and then using my brayer, covered the card with purple ink. Then, I sponged on some darker purple ink in the corner with the masks. I made sure to show lighter and darker spots of the sponging giving more dimension. After the masks were removed, I added a sentiment in black and some doodling around the card. I love this way of finishing off a card (as you can see in a few samples HERE and HERE).
Supplies: Stamps - Spiral Bouquet (Papertrey Ink); Ink - Lavendar Lace, Elegant Eggplant (Stampin' Up!); Paper - Whisper White (Stampin' Up!); Other - masks (Ranger), black marker (Zig), sponge.
Have you ever made a one layer card?? Link it up, I'd love to see it!!
Donelda

Monday, October 5, 2009

CAS 35 - Pillow Inspiration

The most recent Clean and Simple challenge on SCS is to use a pillow site to find inspiration. I love inspiration challenges. I found THIS pillow and knew I'd be able to use it for inspiraiton!! As well, I saw Kristina Werner do some doodling on THIS card and wanted to give it a try...and knew this would be a great opportunity!!
Supplies: Stamps - Spiral Bouquet, Demask Designs, Text Boxed (all Papertrey Ink); Paper - Whisper White, River Rock (Stampin' Up!); Ink - Chocolate Chip (Stampin' Up!); Other - white gel pen (Signo)
Thanks for dropping in!!
Donelda

Tuesday, March 17, 2009

smARTworks - Scrapling White Daisy Card

Okay, so if you follow my blog at all, you will know that this is my new favorite size of small card to make. It is 1 1/4" x 4" and just the right size to add a small little note for a friend!! I love to doodle on my cards as you can see here. These flowers were a continueation from the card I posted
yesterday. I stamped them onto vellum and then they were dry embossed on the back. Supplies: Stamps-Daisy Square (smARTworks); Cardstock- Whisper White, Buckaroo Blue(Stampin' Up!); Ink-Basic Black (Stampin' Up!); Other-vellum (Stampin' Up!), black marker (Sakura), embossing stylus.

Thanks for dropping in!

Donelda

Sunday, December 2, 2007

A Piglet Birthday

I love how this little Piglet card turned out!!
Over on Sharon's blog, she issued another Stamp Simply Challenge (#11) called Stick It On. Her challenge was to NOT stamp your main image. We were allowed to stamp backrounds and sentiments but were to use something else as a main image.
Well, I've had these Winnie the Pooh window clingers since my son was just a little boy. I found them in a drawer a few months ago and moved them into my craft room....knowing I'd eventually find something to do with them. Well, here is that something!!
Isn't it cute how Piglet is peeking through the window. That is a frame from KI Memories Funky Frams & Labels sheet. I got it from Rhea at R&R Scrapbooking. She donated some gift bags to our Innisfail Indulgence event in July (how thoughtful and kind of her) and a sheet of these cool frames were in my package. As you know, I am on a mission to USE, USE, USE!!!
I stuck a piece of sticky note in the place where the window would be (a mask) and then stamped the background stamp on the white cardstock. Then, when I put the frame and Piglet on the white cardstock, it would be solid white behind Piglet. The black lines are doddled around the white panel. This makes the front of the card feel finished.
Supplies: Cardstock - Pixie Pink, Whisper White (Stampin' Up), Ink - Pixie Pink, Basic Black (Stampin' Up), Stamps - Soft Swirls (Stampin' Up), Paper Tray (Papertrey Ink), Accessories - Piglet window clinger (manufacturer unknown), ribbon (unknown as it was a gift), balck marker (SU).
If you make a card using something other than a stamp for the main image, post a link in the comment section so I can have a look!!
Thanks for visiting.

Saturday, November 10, 2007

Another Post Today for Beate's WSC27

I just had to post again this morning because I wanted to participate in Beate's Weekend Sketch Challenge #27. Can you say "cool layout". I just might have to do a second card using it to see what else I can come up with.
You've seen these wreaths before -- lots of the talented ladies on SCS have made them. Here is one example, and another but there are lots more if you go looking!! So clearly the idea is not mine, but I've been wanting to make one like it for a long time (probably since last Christmas).
I used my everywhere punch to put 2 holes on the side and tied a bow with some ribbon (getting the bow to look half decent was the hardest part of the making this card). I like the look of doodling around the edge, it just seems to finish off a large plain edged square like this. I also like the rounded edges of the card -- I see it on lots of cards but never think to incorporate it in my designs.
Dimensions of this card are 4 1/4" by 4 1/8". Supplies used: Cardstock: Buckaroo Blue, Whisper White (SU), Ink: Buckaroo Blue (SU), Stamps: Snowflakes (SU), Faux Ribbon (Papertray), Accessories: Ribbon (Michaels), Marker (SU).
Thanks for visiting, again.